A great vision board is more than a pretty collage. It’s a decision device—a daily, visual reminder that focuses your attention on what matters and nudges you toward the next right action. In this guide, you’ll build a board that’s inspiring and practical, so it fuels real progress instead of wishful thinking.
What a Vision Board Actually Does
A vision board works by placing your goals in your line of sight every day. That visibility:
- Keeps your values and priorities top-of-mind.
- Triggers implementation intentions (you see an image and remember the action you planned).
- Helps you persist when motivation dips by reconnecting you to meaning.
The board won’t do the work for you—but it will help you choose the work that matters and keep saying “no” to distractions.
Choose Your Format: Physical vs. Digital
- Physical board: Poster/cork board you can touch. Tactile, memorable, and hard to ignore. Great for home offices or bedrooms.
- Digital board: A single image or slide you set as your phone/desktop wallpaper. Great if you move around a lot or prefer minimalism.
- Hybrid: A small physical board at home + a simplified digital version for on-the-go reminders.
Define Your “North Star” First
Before you start cutting and pinning, write a one-sentence headline at the top of a page:
“Over the next 12 months, I will ______ so that ______.”
Examples:
- “Over the next 12 months, I will publish 12 essays so that I build an audience of 1,000 readers.”
- “Over the next 12 months, I will save $5,000 so that I can move to a coastal city.”
This North Star filters what belongs on your board (and what doesn’t).
Pick 5–7 Life Domains (and One Measurable Outcome Each)
Choose a handful so your board is focused, not crowded:
- Health: 3 strength sessions/week
- Career/Business: 2 client pitches/week
- Finances: Emergency fund to $5,000
- Learning/Skill: Guitar practice 20 min/day
- Relationships/Community: One friend date weekly
- Creative/Impact: Publish a monthly video
- Environment/Home: Declutter one drawer/day
Write a crisp outcome for each domain. These will become captions or sticky notes on the board.
Gather Images the Smart Way
Use images that cue action, not just vibes.
- Process images: A person writing at a desk, a running trail at sunrise, a habit tracker—pictures that remind you of the work, not only the finish line.
- Outcome images: A finished book mockup, a speaking stage, a savings milestone. Sprinkle these in for motivation.
- Identity images: Visuals that reflect the type of person you’re becoming (organized, generous, strong, curious).
Tip: Fewer, bigger images beat many tiny ones. Your brain won’t read fine print from across the room.
Words That Work: Add Micro-Scripts
Next to (or on) each image, add a short script that tells your brain what to do when you see it:
- “If it’s 7:00 a.m., then I write 200 words.”
- “If I open my wallet, then I log the expense.”
- “If it’s Monday, then I send 2 pitches.”
These are your implementation intentions—turning pictures into predictable actions.
Layout Options (Pick One)
- 4-Quadrant Board – Top-left: Process, Top-right: Outcomes, Bottom-left: Identity, Bottom-right: Environments/Habits. Balanced and easy to scan.
- Timeline Board – Left to right: Now → 90 days → 6 months → 12 months. Great for planners who like sequencing.
- Habit Grid – Rows = life domains, Columns = daily/weekly actions. Place icons or mini-cards you can move across as you complete reps.
Whichever layout you pick, leave white space so your eyes can rest; clutter blurs the message.
Build It: Step-by-Step (Physical Board)
- Base & headline: Mount a neutral background; write your North Star at the top.
- Anchor images: Place 3–5 large images (process-heavy) in a loose triangle for balance.
- Add outcomes: 2–3 hero images that represent milestone moments.
- Micro-scripts: Use clean, high-contrast sticky notes (or printed labels).
- Dates & numbers: Add simple metrics: “Oct 15: 1st client,” “$5k by Dec 1.”
- Tiny wins area: Reserve a corner for evidence—photos, receipts, or notes showing progress.
Build It: Step-by-Step (Digital Board)
- Create a 16:9 canvas (1920×1080 works on most screens).
- Drop 5–7 high-res images; avoid busy backgrounds.
- Overlay 1–3 short micro-scripts in a readable font (no more than 7 words each).
- Add a thin border or subtle vignette to reduce visual noise on busy desktops.
- Export one version for desktop and one cropped for your phone lock screen.
Where to Put It (and How to See It Daily)
- Physical: Above your desk, next to the mirror, or inside a closet you open every morning.
- Digital: Desktop wallpaper + phone lock screen.
- Backup: A printed mini version in your notebook.
Seeing matters more than making. Put it where your eyes go without effort.
The Review Ritual (5 Minutes/Day, 15/Week, 30/Month)
- Daily (5 min): Scan the board; say one sentence per image: “Today, I will [specific action].”
- Weekly (15 min): Choose two actions to ship this week; add or remove one sticky note if the plan changed.
- Monthly (30 min): Swap any image that no longer fits; add one evidence item (testimonial, graph, photo).
This rhythm keeps the board alive instead of becoming wall art you ignore.
Turn Pictures into Progress: The Evidence Shelf
Dedicate space for proof:
- Before/after photos, word-count snapshots, savings screenshots, race bibs, client notes.
- A simple “Done List” card you update weekly.
Proof changes your identity faster than affirmations. When you can see your wins, you act bolder.
Common Mistakes (and Easy Fixes)
- Mistake: “Aesthetic only” boards that look great but don’t guide behavior.
Fix: Add micro-scripts and numbers to each domain. - Mistake: Too many images.
Fix: Cap at 8–12 total; make the important ones big. - Mistake: Outcome-only fantasy.
Fix: Ensure at least 60% of images show process/behavior. - Mistake: One-and-done boards.
Fix: Refresh monthly; retire images once the goal is achieved.
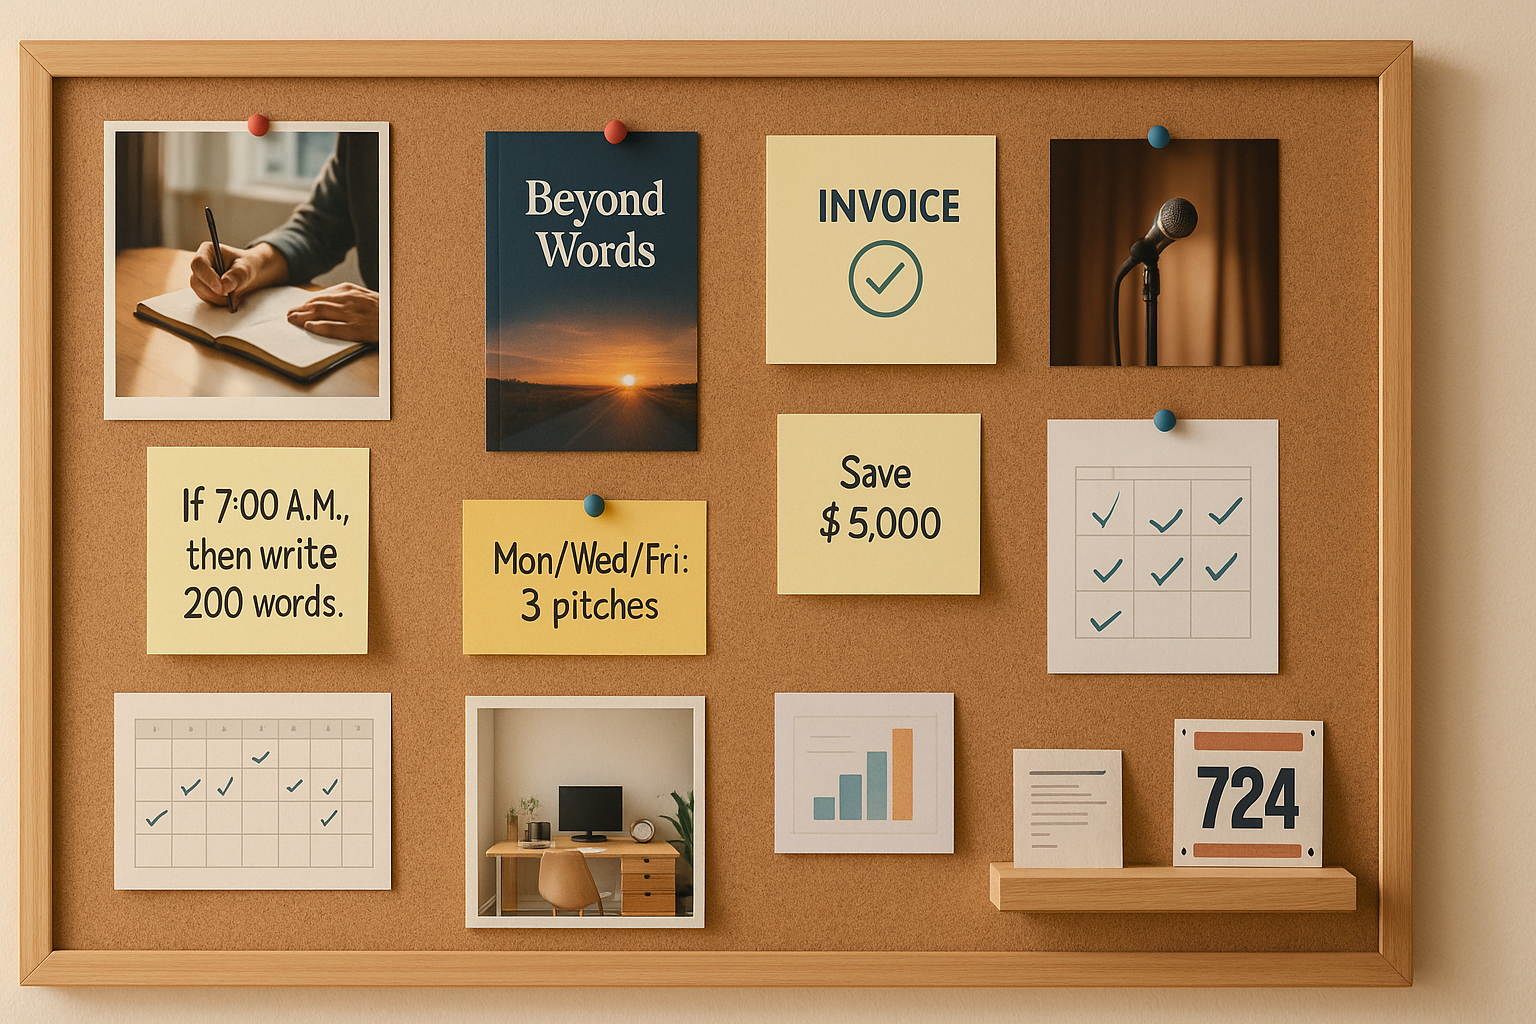
Example: A 90-Day Vision Board in Practice
North Star: “In 90 days, I’ll sign 3 freelance clients so I can earn $2,000/month.”
- Process images: Person sending emails, calendar with 3 outreach blocks/week.
- Outcome images: Simple invoice paid, a smiling client Zoom screenshot.
- Micro-scripts: “Mon/Wed/Fri: 3 pitches,” “Tue/Thu: portfolio upgrade 45 min.”
- Evidence shelf: Screenshot of first reply, draft contract, testimonial snippet.
- Weekly review: Replace low-response niches; add the best-performing outreach template as a mini card.
Quick Start Checklist
- One-sentence North Star
- 5–7 domains with measurable outcomes
- 8–12 images (≥60% process)
- Micro-scripts next to each image
- Visible placement (physical and/or digital)
- Review cadence scheduled
- Evidence shelf ready
Final Word
A powerful vision board is clarity you can see. Keep it simple, keep it visible, and keep it current. Pair every picture with a next step and a place to show your proof. That’s how visions move from the wall into your life.